We’ve all been there: Your beloved snowboard jacket starts feeling… gross. It smells a little funky, and worse, when you’re out on a powder day, water isn’t beading up anymore—it’s soaking right in. You might have been told over the years that washing technical gear is a death sentence, but that couldn’t be further from the truth!
The reality is that a jacket that is clean is a jacket that performs. Proper care restores its breathability and waterproof power, ensuring your gear stays in top shape for years. If your snowboard jacket has a nonporous membrane, like those used in some technical outerwear, it actually loves to be washed and dried.
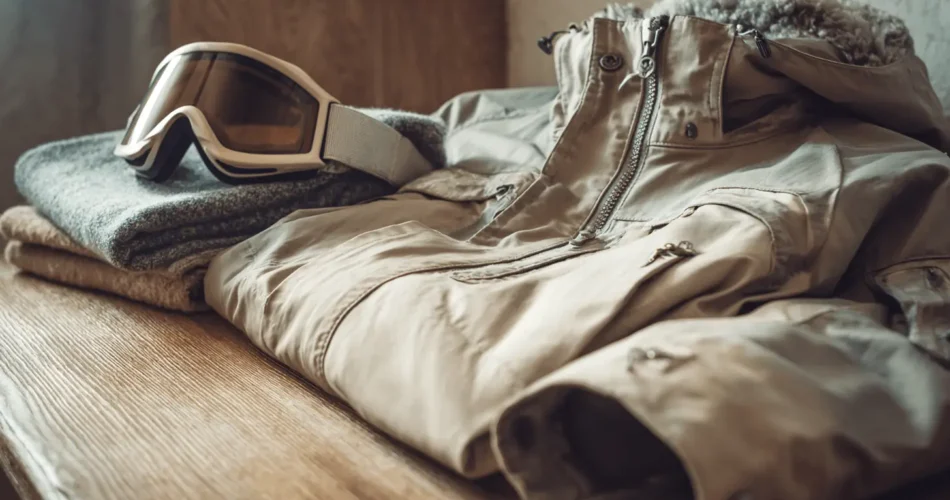
Here is your comprehensive, easy guide to safely washing and re-waterproofing your technical snowboard gear. This video breaks down how to wash, dry, and reproof your hardshell jacket the right way
Related Articles
How to Wash Snowboard Pants
What to Wear Under a Snowboard Jacket
How to Wash a Waterproof Jacket
Why Your Jacket Needs a Spa Day (The Science of DWR)
Your snowboard jacket stays dry thanks to two main defenses: an inner waterproof membrane (like GORE-TEX or other proprietary materials) and an outer coating called Durable Water Repellent (DWR).
DWR is the first line of defense, creating an ultra-thin layer of tiny, rigid microscopic bristles on the fabric surface. This causes water droplets to bead up and roll off.
However, DWR is not permanent. Dirt, body oils, sweat, sunscreen, and grime quickly compromise the DWR.
When the DWR fails, the outer fabric starts absorbing water—a phenomenon called “wetting out”.
This wetting out is a huge bummer because it essentially shuts down the garment’s breathability. If the outer fabric is saturated, your waterproof membrane can no longer push your body’s moisture vapor to the exterior, meaning all your sweat gets trapped inside, leaving you feeling cold, clammy, and “leaking” from the inside out.
The solution? Wash it! Washing removes the contaminants masking the DWR and helps restore its function.
Part 1: The Critical Preparation Phase
The most important steps happen before the wash cycle starts. You need to prevent both mechanical damage (snags) and chemical contamination (soap residue).
Step 1: Prep Your Gear
Get your jacket ready to go through the spin cycle safely:
- Empty all pockets and fully close all zippers (front, pockets, pit zips).
- Fasten all flaps and straps, including Velcro/hook-and-loop closures, to prevent snagging.
- Spot treat any heavily soiled areas (like cuffs and collars) by applying a small amount of diluted technical cleaner directly to the spot. Avoid aggressive scrubbing.
Step 2: Decontaminate Your Washing Machine
This is critical. Standard household detergents leave behind highly water-attracting (hydrophilic) residue that will instantly ruin your jacket’s water-repellency.
- Thoroughly clean the detergent and fabric conditioner trays, ensuring no traces of household products remain.
- Run an empty “ghost” wash cycle (a quick wash with hot water and no detergent) to flush residual soap from the machine’s internal plumbing and drum.
Step 3: Isolation Protocol
Technical apparel should always be washed in isolation.
- Wash your snowboard jacket and pants separately from regular clothing.
- Do not mix them with natural fibers like cotton, wool, or denim, as these can shed fibers that physically clog the microscopic pores of the waterproof membrane.
- Limit the load to one or two items per cycle.
Part 2: Washing Your Snowboard Jacket
When it comes to the wash itself, remember the cardinal rule: NO REGULAR DETERGENT!
What to Avoid (The DWR Killers)
- Standard Household Detergents (Liquid or Powder): They leave residue that blocks water repellency and breathability.
- Fabric Softeners: These are particularly destructive, as the compounds they deposit coat and block the DWR structure, ensuring the fabric holds moisture.
- Bleach or Stain Removers: These chemicals can damage the waterproof membrane.
Choosing the Right Technical Wash
You must use a specialized, additive-free liquid technical wash. These use mild, non-residue soaps that clean off dirt and oils without compromising the DWR coating.
Popular specialized cleaning products include:
- Grangers Performance Wash.
- Nikwax Tech Wash.
(You can find links to purchase gear care products and technical outerwear from trusted brands by checking the TREW Gear Journal or the Grundens Blog.)
Machine Settings
- Cycle: Use a gentle or delicate cycle.
- Water Temperature: Cold or warm water, strictly regulated not to exceed 105°F (40°C).
- Rinse: Always perform a double rinse to ensure all cleaning agents—even the mild technical wash—are completely removed.
- Spin: Minimize or disable the spin cycle to protect the laminate and seams from stress.
Part 3: Drying and DWR Reactivation (Don’t Fear the Dryer!)
Proper drying is crucial because, for most DWR treatments, controlled heat is needed to restore the coating.
Pro Tip: “Don’t fear the dryer! Our gear can handle it. The heat of the dryer actually helps reactivate the chemistry of the DWR, reestablishing that surface tension that you need to repel water.”
Tumble Drying Protocol
- Tumble dry on a low to medium warm, gentle cycle. Avoid high heat completely, as this can damage the waterproof membrane and melt seam taping.
- Once the jacket is dry, run an extra 15–20 minutes on a warm setting. This dedicated time is critical for thermally reactivating the DWR.
- For insulated jackets: Add 2–3 clean, dry tennis balls or specialized dryer balls to the dryer. This gentle beating action helps fluff up the down or synthetic insulation and prevents clumping, maximizing thermal efficiency.
Air Drying Alternative
If you don’t have a tumble dryer or prefer not to use one:
- Line dry the jacket in a cool, well-ventilated space. Avoid direct sunlight or extreme heat sources.
- Once completely dry, you can reactivate the DWR using an iron set to low heat (gentle setting).
- Crucially, place a thin towel or cloth between the iron and the fabric to prevent melting.
- Never use steam when ironing, as moisture counteracts the activation process.
Part 4: Reproofing—When to Reapply DWR
After washing and heat-drying, water should bead up and roll off your jacket. If it still soaks in (wets out), the original DWR is worn down, and you need to reapply a specialized DWR treatment.
Requirement: DWR must be applied to a freshly washed garment.
You have two main options for DWR reapplication: wash-in treatments or spray-on applications, and many seasoned adventurers combine both methods.
DWR Reapplication Showdown: Spray-On vs. Wash-In
| Feature | Spray-On Treatment | Wash-In Treatment |
| Primary Goal | Targeted maintenance of high-wear zones (cuffs, shoulders) | Comprehensive restoration of the entire garment |
| Application | Applied externally to clean, damp, or dry fabric | Added to the washing machine in a second cycle |
| Coverage | Surface-level; great for quick touch-ups | Full fiber penetration; coats seams and hidden areas |
| Durability | Shorter lifespan; sits on the surface | Longer lasting; bonds deeply within the fibers |
Product Recommendations
Specialized brands like Nikwax and Grangers offer these solutions.
- For Quick, Easy Care: Products like Grangers Wash + Repel 2-in-1 combine gentle cleaning with DWR application in one cycle.
- For Focused Cleaning + Reproofing: Use a dedicated wash (like Grangers Performance Wash) followed by a separate re-proofing product (like Repel Plus DWR spray).
(Check the Quiksilver Snow Clothes or Helly Hansen websites for product availability and current care guidelines.)
Conclusion
Taking the time to correctly wash and store your snowboard gear is a valuable investment. Remember to exclude standard laundry products, use a technical wash, and employ controlled heat after washing to keep the DWR activated. By prioritizing cleanliness and thermal restoration, you ensure your jacket’s waterproofness and breathability are fully functional, ready for your next adventure.