If you’re new to the trail, you might be scratching your head and wondering, “What’s the difference between a daypack and a backpack?”. After all, they’re both devices you attach to your back to carry your gear, right?.
Well, kind of! Technically, anything with shoulder straps can be considered a backpack, meaning a hiking daypack is a type of backpack—but not all backpacks are daypacks. Learning this subtle difference is the first step toward choosing the right gear, whether you’re headed for a quick coffee run or a year-long trek.
Let’s dive into the science of choosing the right bag and packing it like a pro, because carrying a load comfortably is about working with your body, not against it.
Related Articles •
How Much Weight Can a Backpack Really Hold? •
How to Clean and Preserve an Outdoor Backpack •
Can You Wash a Backpack in the Washing Machine?
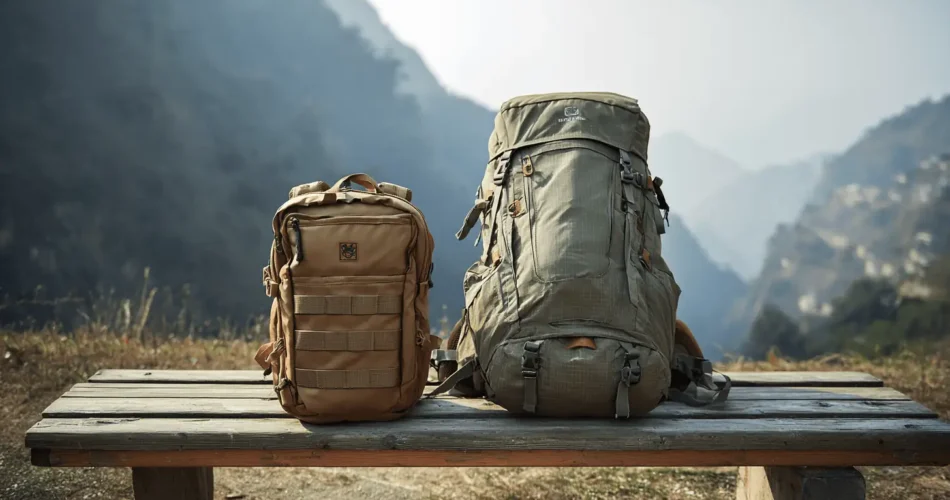
Daypack vs. Backpack: Understanding the Core Differences
The primary distinction between a daypack and a full backpack essentially boils down to size, or carrying capacity, measured in liters (L). But the differences extend far beyond just volume, affecting structure, support, and intended use.
The Daypack Difference
A daypack is typically a small, lightweight bag made for daily use, short outings, or day hikes (hence the name).
- Capacity: Generally holds between 15L and 35L. A 15L pack can fit a water bladder or laptop, while a 35L version might suffice for an ultralight overnighter or weekend trip where you stay in a hotel.
- Structure & Support: Daypacks are lightweight and often soft or compressible (packable). They usually have little or no internal frame or back support, and may not have padded shoulder straps, as they aren’t designed for heavy loads or long periods of wear.
- Best Uses: Day hikes, daily commutes, coffee shop runs, city sightseeing, urban adventures, or as a carry-on/camera bag. Daypacks can also be packed empty into a larger backpack to be used for small trips once you reach your destination.
- Style: They tend to be more versatile and stylish, used on the trail, in the coffee shop, and at work.
The Backpack Advantage
A backpack (or larger pack) is built for longer adventures, heavy loads, and multi-day trips.
- Capacity: These bags are larger, typically holding anywhere from 35 liters up to 80+ liters.
- Structure & Support: Larger backpacks are designed to carry heavy loads comfortably. They typically feature a rigid internal frame or structured back panel for better back support. They come with padded shoulder straps, hip belts (to snap around your waist), and sternum straps (across your chest) to help transfer and stabilize the load.
- Best Uses: Multi-day camping trips, around-the-world travels, overnight hiking, or anything requiring heavy gear (leveling up around 25 pounds).
- Materials: Backpacks generally need to be water and weatherproof (or resistant) to meet the demands of extended travel.
| Feature | Daypack | Backpack |
| Capacity | 15–35 liters | 35–80+ liters |
| Best Use | Daily trips, short hikes, urban adventures, carry-on | Multi-day camping, extended travel, heavy gear |
| Internal Frame | Little or none (often packable) | Rigid frame or structured back for support |
| Comfort Features | Light padding, simple straps (often stylish) | Padded shoulder straps, hip belts, and back support |
| Accessibility | Top loading | Top, side, and bottom access options |
The Science of Comfort: Mastering Backpack Ergonomics and Adjustment
A well-adjusted rucksack will add miles to the distance you can march, not to mention keeping you operational when you reach your destination. This comfort is governed by two key ergonomic concepts: load distribution and weight balance.
The goal is to align the load’s center of gravity (COG) with your body’s natural COG (usually near the navel). If you get this wrong, poor load distribution can increase energy use by up to 15%, making you tire faster, and potentially straining your spine, shoulders, and hips.
The Six-Step Adjustment Protocol
Before a long march or hike, you must adjust your pack’s suspension system in a strict, sequential order. You may need to slightly change these adjustments as you march to vary weight distribution between the shoulder straps and hip belt, preventing numbness or fatigue.
- Loosen All Straps: Start by fully loosening all straps: hipbelt, shoulder straps, sternum strap, and load lifters.
- Fasten the Hipbelt: The hipbelt is the primary load bearer and should carry the majority of the weight. Tighten it firmly so it sits securely over the top of your hip bones (iliac crest).
- Adjust Shoulder Straps: Tighten the shoulder straps only enough to pull the pack snugly against your back and balance the load; the hips must still bear the primary pressure.
- Tighten Load Lifters: These straps (found behind the shoulder straps) should be pulled tight so the rucksack hugs close to your body. This maximizes kinetic stability by aligning the COG close to your spine.
- Adjust the Sternum Strap: This strap crosses your chest to prevent the shoulder straps from sliding off. Pull it tight, but not so tight that it restricts your breathing.
- Cinch Compression Straps: All external compression straps should be cinched down to stabilize external gear and maintain internal load density.
The Strategic Art of Packing: Load Distribution Architecture
Packing efficiently is an art guided by the principles of Accessibility, Balance, and Compression (ABC). The process is best structured using a three-zone architecture, ensuring the load is stable, anchored on your hips, and accessible when needed.
The Core Zone Rule: Placing the Heaviest Gear
The single most critical rule is placing the heaviest and most dense items close to your back panel. Specifically, these items belong in the Core Zone (the middle section) of your pack, spanning from your lower shoulder blades down toward your lower back.
If the heavy core is packed too low (near the hips), the pack will sag backward, forcing you to lean forward excessively and leading to shoulder fatigue. If packed too high, you become top-heavy, which compromises stability, especially on technical terrain.
The Zonal Packing Matrix
| Zone | Weight Class | Primary Purpose | Example Contents | Accessibility |
| Bottom | Light / Bulky | Forms a stable foundation; shock absorption | Sleeping Bag/Pad, Camp Shoes, Sleep Layers | Least Accessed (Not needed until camp) |
| Core (Middle/Back) | Heavy / Dense | Anchors the pack’s center of gravity close to the spine | Food Stash, Cook Kit, Stove, Water Reservoir, Bear Canister | Infrequently Accessed |
| Top | Medium / Bulky | Trail essentials; quick access before camp setup | Rain Gear, Insulated Jacket, First-Aid Kit, Water Filter | Quick Access |
| Peripheral Pockets | Light / Specialized | Urgent and frequent access | Map for today, Snacks, Sunscreen, Headlamp, Phone, GPS | Constant Access |
A Note on External Gear: Try to avoid strapping too many items to the exterior of your pack, as hanging gear can snag on branches or throw off your balance.
Volume Optimization Hacks: Rolling, Compression, and Void Filling
Efficient packing requires moving beyond just arranging items; you must maximize space by reducing volume. The goal is to turn unstable volume into a dense, solid core that resists shifting.
- Compression is King: Compression sacks are crucial for bulky items like sleeping bags, sweaters, and puffy jackets, as they expel trapped air, transforming volume into compact, uniform packages.
- Roll, Don’t Fold: The military roll (or Ranger roll) is a superior space-saving technique for garments like t-shirts, pants, and underwear. This method creates taut, compact cylinders that minimize wrinkles better than traditional folding and can save significant space.
| Clothing Item | Traditional Folding (cu. in.) | Rolling Method (cu. in.) | Space Savings (%) |
| T-Shirt | 48 | 32 | 33 |
| Jeans | 120 | 96 | 20 |
| Dress Shirt | 72 | 60 | 17 |
| Sweater | 192 | 144 | 25 |
- Embrace Void Filling (Nesting): Maximize packing density by strategically stuffing small, flexible items like rolled socks and underwear into all internal spaces, such as inside shoes, hats, or cook pots, to eliminate air gaps and stabilize the load.
- Use Kits and Cubes: Professional packers use systems to transform chaos into organized groups. Packing cubes or stuff sacks are your best friends for keeping clothes organized and preventing them from getting shuffled up. Use separate pouches for liquids and toiletries to prevent spills and streamline organization.
Waterproofing Your Gear
Since few backpacks are fully waterproof (seams are often unsealed, and zippers can allow water through), proactive waterproofing is essential for the “Dryness” principle.
- Pack Liner: Use heavy-duty, 20-gallon trash compactor bags as cheap, tough, and effective waterproof pack liners inside your main compartment.
- Wet Gear Management: If your shelter or rain gear is wet, keep it inside the main compartment but outside the pack liner, ensuring your dry gear remains protected.
- Small Items: For maps and electronics, durable freezer-style zipper-closure bags are effective for protecting water-sensitive items.
Preparing for the Unexpected: Emergency Go-Kits
Efficient packing applies even to emergency preparedness. Emergencies can occur anywhere—at home, at work, or just out and about—so it’s vital to have important supplies with you.
A Grab-and-Go kit is an easy-to-carry kit that you can grab if you have to leave home in a hurry. It should contain things you can carry and use without help.
Store your kits in a waterproof container in a specific, easy-to-find place. Remember, you should plan for enough supplies, such as medication and disability-specific items, to last for up to two weeks, doing what is realistic for you to carry in a backpack or drawstring bag.
Grab-and-Go Kit Essentials Checklist Highlights
- Important Information: Emergency health information and copies of emergency contacts list.
- Medication: Copies of current prescriptions and essential medications.
- Communication & Power: Cell phone charger, extra batteries for devices (hearing aids, radios, cell phones), and a small battery-operated radio.
- Survival Basics: Emergency food and water, assorted re-closeable plastic bags.
- Safety: Signaling device (whistle, horn, etc.) to attract attention, and sturdy work gloves to protect hands from sharp objects.
Conclusion: Pack Smart, Not Hard
The choice between a daypack and a full backpack boils down to your adventure: choose a daypack for light, short trips and a backpack if your journey lasts several days or requires heavy gear. If you travel frequently, you might need both—a large pack for your gear and a daypack for daily essentials.
Ultimately, learning how to pack a backpack is a rigorous synthesis of logistics, physical science, and thoughtful organization. By strictly adhering to the Core Zone rule (heavy items close to your back), embracing volume optimization (rolling and compression), and mastering the adjustment protocol (hipbelt first!), you can transform your bag from a burden into a comfortable extension of your kinetic system, ready for the miles ahead.
A poorly packed bag forces your body into awkward positions, but a well-packed bag works in harmony with your body, making your adventures smoother and far more enjoyable. Get organized, hit the trail, and never look back!