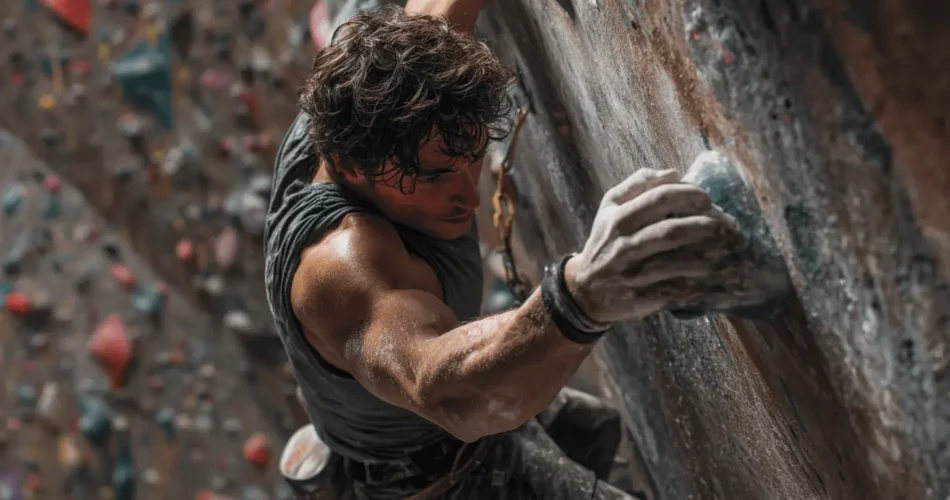
If you’ve ever felt that dreaded “forearm pump” or shot for a challenging hold only to have your fingers peel off, you know the truth: grip strength is everything. Improving your hand and forearm power is crucial for tackling tougher routes, delaying fatigue, and sending projects with confidence.
We’re diving deep into the exercises, protocols, and safety tips you need to build the strongest, most resilient grip possible, drawing on proven techniques used by serious athletes.
Related Articles
What Muscles Does Rock Climbing Work?
How Many Calories Does Rock Climbing Burn?
How to Tie a Rock Climbing Knot
1. The Foundation: Understanding Grip and Safety
Climbing strength isn’t just one thing. There’s a difference between the strength required to initiate a move (pulling power) and the strength needed to catch and stabilize a hold (contact strength). Most climbers focus too much on the former, neglecting the quick, reactive finger power needed to “stick the landing” dynamically.
Essential Grip Types in Climbing
Different holds require different techniques, which place specific loads on your fingers.
| Grip Type | Description & Biomechanics | Injury Risk Focus |
| Crimp Grip (Full/Half) | Proximal interphalangeal (PIP) joints flexed 90°–100°, distal interphalangeal (DIP) joints extended. Highly effective for force generation. | Highest. Puts maximum stress on the A2 pulley (the most commonly injured pulley). |
| Open Hand Grip | PIP joints are extended or slightly flexed, distributing force more broadly. | Lower Risk. Generally considered safer for the pulley system. |
| Pinch Grips | Uses opposition between fingers and thumb. Crucial for stabilizing square or wide holds. | Requires specific training to develop high normal pressing force. |
Crucial Safety Note: During high-intensity training like hangboarding, never use a full crimp (where the thumb locks over the index finger). This position concentrates extreme stress on your pulleys and significantly increases the risk of rupture.
Prerequisites for Intensive Training
Before starting high-intensity training, especially dynamic work like campus boarding, you must have a solid base:
- Build a solid foundation of resilience in your fingers, elbows, and shoulders.
- Beginner climbers should focus primarily on climbing frequently (2–3 days per week) and improving technique, as this alone leads to great strength gains in the first months/years.
- For full campus board work, typically be climbing around V5 grade and have at least two years of climbing experience.
2. Training Maximum Strength with Hangboards
Hangboards (or fingerboards) offer the most controlled and quantifiable environment to maximize finger strength. These protocols focus on short, high-tension isometric holds to stimulate neurological recruitment and structural adaptation.
Proven Hangboard Protocols for Strength
Always perform a thorough warm-up, including light bouldering (15–20 minutes) or pull-ups on jugs, before starting a maximum strength session. Remember to maintain an engaged posture (“shoulders down, chest out”) and never hang with relaxed shoulders.
| Protocol | Goal | Hang Time | Rest Per Hang | Hangs per Set | Key Details |
| Minimum Edge (MET) | Max Strength, Tendon Adaptation | 12 seconds | 3 minutes | 5 | Find the smallest edge you can hold for a max of 15 seconds. Terminate hang before failure (RPE 9-9.5). |
| Max Weight (MAW) | Max Strength, Neurological Recruitment | 10 seconds | 3 minutes | 5 | Use larger holds (14–20mm is ideal) and add weight (5–55 kg). Aim to barely hold for 13 seconds total with max effort. |
| Max Weight “7-53” (Advanced) | Max Strength, Aerobic Power | 7 seconds | 53 seconds | 3 | Use weight that would make a 10-second hang maximally difficult. The short rest boosts CP resynthesis rate. |
Tip for Progression: To progress safely, start with larger holds, systematically adding weight (up to 50% of bodyweight). When you reach a ceiling, drop to a smaller hold size and start over with less weight. Limit yourself to two to three dedicated grip sessions per week.
3. Training Endurance to Delay the Pump
The dreaded “forearm pump” occurs because climbing involves repeated static (isometric) contractions that inhibit blood flow, leading to rapid accumulation of blood lactate and fatigue. Endurance training focuses on increasing the muscle’s capacity to handle this metabolic stress.
The Repeater Protocol
The Repeater protocol is widely accepted for developing strength endurance and promoting hypertrophy (muscle growth).
The standard approach uses a 7/3 work-rest ratio:
- Perform a 7-second hang.
- Follow immediately with a 3-second rest/shake-out.
- Repeat this 6 times to complete one set.
- Rest 3 minutes between sets.
Route climbers often perform 10 to 20 sets of repeaters using moderate holds and intensity, aiming for only 1 minute of rest between sets to target both anaerobic and aerobic systems equally.
General Endurance and Stamina Drills
Beyond the hangboard, you can build endurance using functional exercises:
- Dead Hangs: Hang from a pull-up bar or large hold for as long as possible (beginners can aim for 3 sets of 30 seconds).
- Endurance Static Hangs: Hang from two hands, drop one arm to shake it out for at least five seconds, then switch. This mimics resting mid-route.
- Time-Based Forearm Curls: Adapt traditional forearm curls (using a dumbbell, palm up) by focusing on continuous work for 1 to 5 minutes or more, matching the typical duration of a sport route.
- Continuous Traversing: Move horizontally around the climbing gym on easy holds for at least 20 minutes continuously.
4. Developing Dynamic Power: Contact Strength
Contact strength is your Rate of Force Development (RFD)—how quickly you can contract your finger flexors to latch a hold when moving dynamically. This training must incorporate speed and shock loading.
The campus board is the prime tool for this, but due to high impact, exercises must be executed with impeccable technique and engaged shoulders.
Campus Board Exercises for RFD
Remember, training should progress from least to most stressful in terms of force load and injury risk. Do just enough quality sets to ingrain the effects, and stop well before fatigue.
| Exercise | Focus | Technique Tip |
| Campus Laddering | Eliminating dead time between moves. | Keep reaches short; avoid huge jumps, which train pulling power more than contact strength. |
| One-Arm Lunging | Quick force absorption. | Pull to a near-weightless “deadpoint,” drop to the lower rung, and bounce back up fast. The transition should take less than 1-2 seconds. |
| Campus Bumps | High rate of force development (RFD) in one hand. | Keep one hand locked off on the bottom rung while the other quickly bumps up one rung at a time. |
| Campus Switches | Coordination and rapid force stabilization. | Move both hands simultaneously between rungs. Focus on maintaining a stable torso during the switch. |
| Campus Double Dynos | Maximal explosive power. | Only attempt if you are advanced (V9/5.13 minimum), and have first mastered all preceding exercises due to high injury risk. |
5. Auxiliary Training for Resilience and Balance
Grip strength relies heavily on the flexor muscles (underside of the forearm), but neglecting the extensor muscles (top of the forearm) can lead to painful overuse injuries, such as Medial Epicondylitis (Climber’s/Golfer’s Elbow). Extensors are crucial antagonist stabilizers that protect the wrist and elbow during powerful grips.
Antagonist and Pinch Training
| Exercise | Target | Protocol | Benefit |
| Dumbbell Wrist Extensions (Reverse Curls) | Forearm Extensors/Supinators | 3 sets of 15 repetitions, performed once daily. Rest elbow on knee/bench, palm down, and slowly curl the weight upward. | Strengthens antagonists to reduce stress on the medial epicondyle (Climber’s Elbow prevention). |
| Resistance Band Finger Extensions | Finger Extensors | Spread fingers against resistance. Perform 3 sets of 10–15 repetitions, holding max extension for 5 seconds. | Balances powerful flexors and is vital for preventing injury. |
| Plate Pinches / Pinch Blocks | Thumb and Finger Flexors | Hold two smooth weight plates pinched together (smooth sides out) or a block, for 3 sets of 30–60 seconds per hand. | Develops pinch grip essential for many holds. |
| Farmer’s Walks | Overall Grip Endurance (Crush) | Hold a heavy dumbbell or kettlebell in each hand and walk for 30–60 seconds. | Functional exercise that builds general stamina. |
Conclusion: Consistency is Key
Building exceptional grip strength for climbing is a long game that requires consistency, not just intensity. You can achieve significant results by systematically targeting strength, endurance, and power while supporting your joints with antagonist training.
Aim to incorporate two to three structured grip training sessions per week, ensuring you always allow adequate time for recovery. Finger tendons need between 36 and 72 hours to fully recover from heavy loading.
By mastering these protocols and listening to your body—stopping sessions when you feel weak to prevent injury—you will not only see major gains in your strength-to-weight ratio but also climb smarter and stay healthier on the wall for seasons to come.